AI Content Generation
This article walks you through our Content Generation tool.

The AI Content Generation tool consists of a menu and a settings panel on the left, and a Plain Document, also knows as your free writing doc, where you write input and receive output.
This version uses the new GPT-4 Turbo for generating content.
TIP: When you want to use the tool, please first log out and in again before use. We frequently release updates and tweaks and this will ensure that you are working with the latest version.
![]() The Content Generation is placed on the left side of the platform in the menu. Click the icon to open the tool to the main view, which consists of the left side panel with settings, the top menu and the content generation workspace.
The Content Generation is placed on the left side of the platform in the menu. Click the icon to open the tool to the main view, which consists of the left side panel with settings, the top menu and the content generation workspace. 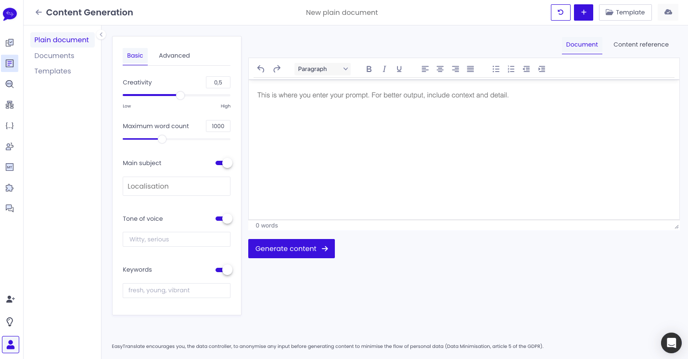
Settings
On the left side you have the settings to tweak your content generation output so it best suits your purpose and gives you the desired outcome.
Regular settings:
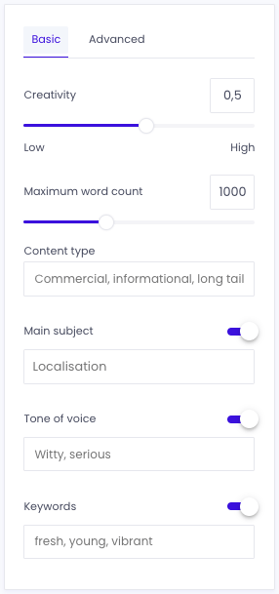
Some settings are carried over from the previous version of AI Content Generation.
Creativity: This feature allows you to determine how creative you want the output to be. Low keeps it strict to the prompt, and high gives it more freedom
Maximum word count: This feature allows to you to determine how long you want the output to be. Most of the time it will adhere strictly and cut of a sentence at the word count. Depending on other settings, it will a few more words to not cut it off.
Added settings:
We've added new settings that lets you preset some settings, rather than set it with free text. It's a great help while learning to use the tool.
Content Type: Specify the type of content you want to generate, such as a newsletter, a product description, etc.
Main subject: What is your input about?
Tone of voice: What tone would you like the output to be in?
Keywords: The keywords help the tool write the exact output you expect, and includes the keywords you add.
Advanced settings
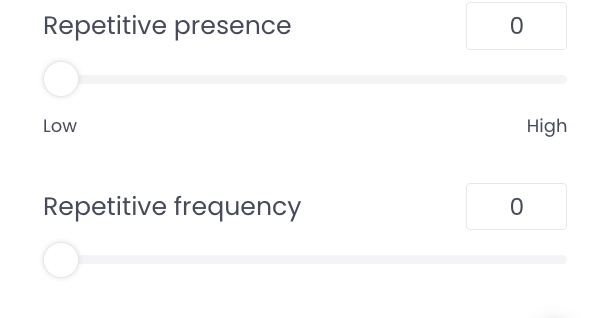 In the Advanced section there are some additional settings to use. This section is made for the GPT super user, and knowing how to use it right can give you a more precise output!
The advanced section includes all of the standard settings, as well as Repetitive presence and Repetitive frequency.
The repetitive frequency sets the positive values to penalise new tokens based on their existing frequency in the text so far, decreasing the model's likelihood to repeat the same line verbatim
The repetitive presence parameter encourages the model to make novel predictions. The presence penalty lowers the probability of a word if it already appeared in the predicted text. Unlike the repetitive frequency, the repetitive penalty does not depend on the frequency at which words appear in past predictions
The Plain Document
Plain Document, or Your free writing document, is where you work with the tool to create the texts you need. Write your prompt to the tool and it will give back your desired content.
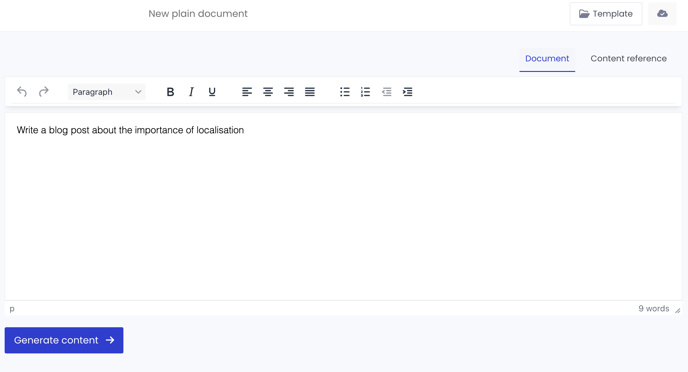
Terms walkthrough:
 New plain document: The working title of your document. It is a good idea to name your dokument for easy organisation. The default name is New plain document, and it doesn't take many of those to create chaos in your saved documents.
.png?width=164&height=81&name=image%20(119).png) Reset template to default: Click to reset all your settings in the current template to standard settings. This will not change anything in the document.
Reset template to default: Click to reset all your settings in the current template to standard settings. This will not change anything in the document.
.png?width=201&height=87&name=image%20(120).png)
Create document: This will clear all content in the document and give you a blank page to work from. This also resets your template and settings. You can import a previous template to use with the blank document.

Template: Templates you have made with the tool can be both saved and uploaded here, for future use.

Document & Content reference:


A window appear with all the familiar fields for creating a translation project, and it works just the same.
Style your document: You can now style your document. Go crazy with bold, italics, headings and much more!
TIP: Style your document once you are happy with your output, and not while you are still working with it!
Documents and Templates
On the left side of the screen, you find your Content Generation menu for easy navigation.
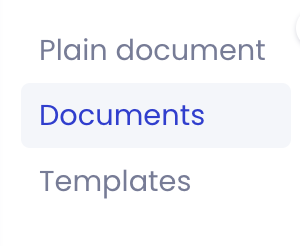 Plain document: The main workspace for working with the Content Generation tool.
Documents: Here all of your saved documents are stored for your convenience. You can also start a new plain document from here.
Templates: Storage for all your templates for easy management.
Documents
From the Documents page, you can manage your saved documents and create new ones.
Click the three dots on the right to open a small menu where you can rename or delete the document.
NOTE: Deleting a document is irreversible, so be sure you do not need it again before confirming the deletion.
 When you want to start with a new and empty document, click Create document on the top right. It will take you to the Plain document screen.
Templates

Templates are a great time saver when you often need to create content with the same settings. In the templates page you can manage your templates. Click the three dots on the right side to open a small menu, from where you can select to Rename or Delete the template.
NOTE: Deleting a template is irreversible, so be sure you do not need it again before confirming the deletion.
Right next to the dots, you can choose to Edit template. This will take you to the template for editing.  When you want to start with a new and empty template, click Create template on the top right. From here, you have the ability to add and store both basic and advanced settings for this template.
