
Zapier is a powerful tool to set up custom workflows, or Zaps, to easily create and receive translation projects from your CMS, file sharing service or chat systems. It can also be used for notifications. Zapier has pre-built integration with many web-apps like Google Drive, Slack, Microsoft Teams, Hubspot, EasyTranslate, etc.
Setup
The very first step is to create an account with Zapier. You can do so here.
A free account (at the time of writing) lets you set up 5 zaps with one Trigger and one Action each. Beyond that, you need to consider a paid account. 5 zaps is more than enough to get started.
It is easy to set up, but if you have any questions, our team is ready to help you set up any variations you require.
Trigger
As Zapier offers endless options for customisation, we will go through an example to show the process.
In this example we will show you how to set up Slack to automatically create projects whenever you drop a file into a dedicated Slack channel. Make sure to create a new Slack channel for this purpose.
Once you have set up your Zapier account, it is time to create zaps.
Click Create Zap
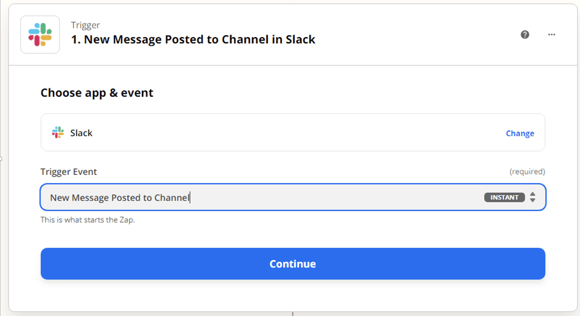
Select the trigger App (Zapier) and the event called New Message Posted to Channel in Slack
Click Continue to go to the next part of the setup.
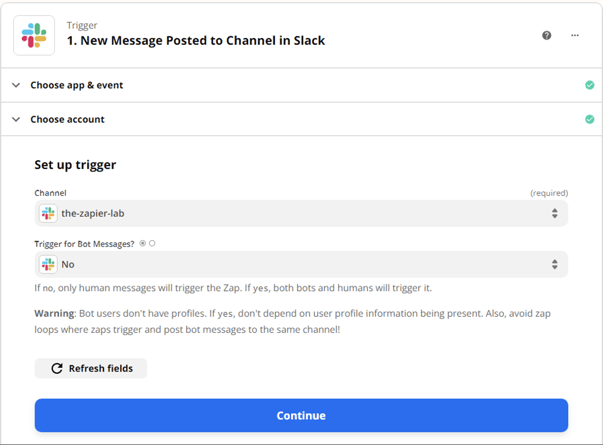
In this step you choose where in your Slack Environment you want to use Zapier, and grant permission for Zapier to interact with your Slack account.
In the first option you decide which channel Zapier should connect to. Select the channel you created earlier.
In the second option, you can select if only human messages or bot messages can trigger the zap workflows. You can also choose to disregard this option and leave it as the default option.
Zapier will now ask you to test the trigger to ensure functionality. We recommend testing the zap by writing a message with a file attached in the selected channel, and making sure that the same message is then displayed in Zapier.
NOTE: Every message sent in this channel will trigger the Zap causing a translation project to be created, once the Zap is published. This does not apply to replies to threads in the channel.
Once Zapier displays that a message has been found, click continue.
Action
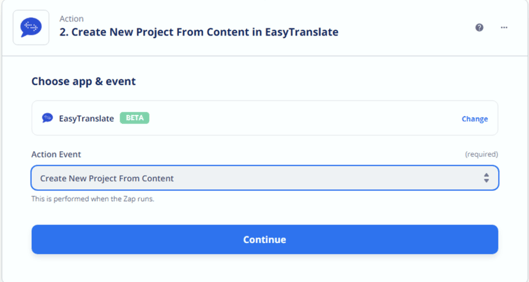
This will open up a new card with the same options you saw for the trigger (Select App & Event), this will be our “Action”.
First, select EasyTranslate as the App, then “Create new Project from file” as the Event.
In the next window, select the EasyTranslate user account that Zapier should use to upload the project.
Now it is time to set up the template for Projects created by this workflow.
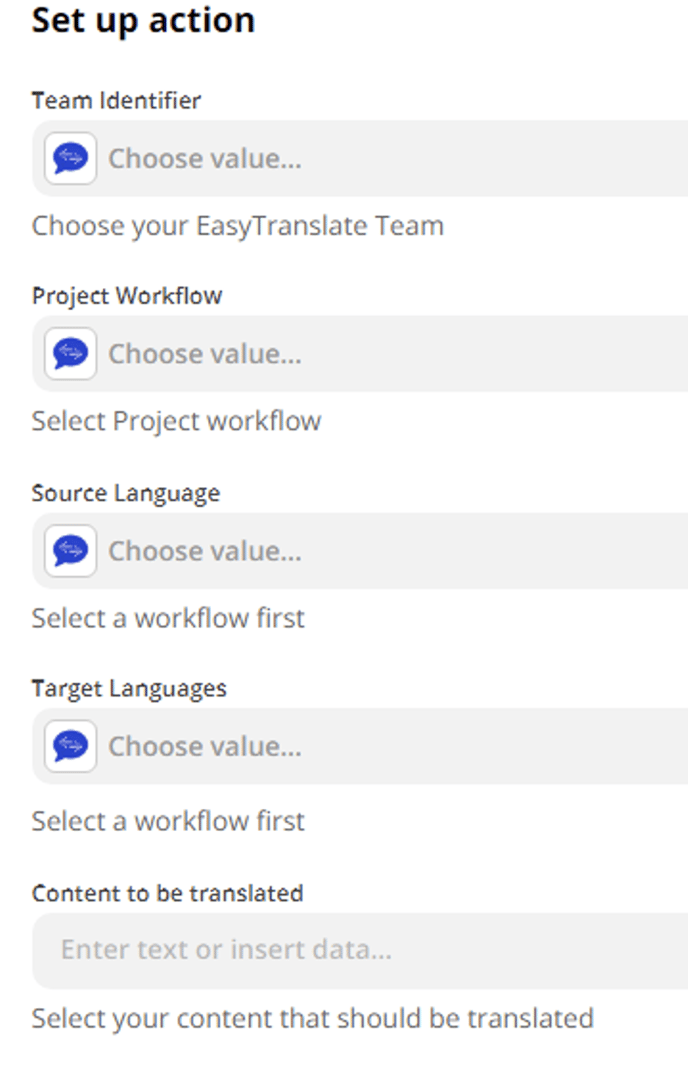
Choose the values that fit your needs.
Team identifier: The team identifier for your account. It is most likely your company name.
Project workflow: Select the EasyTranslate Workflow you want the translation to use, just like when creating projects in the platform. You can use both standard and custom workflows you have created.
Source language: The language you translate from.
Target languages: The language(s) you want to translate the text into. It will be the same for all projects created with this workflow and Slack channel.
File to be translated: Select the file that you sent in the Slack channel. In this example, choose 1. File.
Project Name: If you recall from earlier, you can send a message with your file attached to the slack channel. In this field, we can use that message to specify the name of the project.
NOTE about Source language: Please be aware that all text sent in this channel will be treated as this language. So if you select the source to be English, other languages cannot be translated. The project will be created wrong.
Done
That is it. Your setup is complete and you can start sending files for translation through your dedicated Slack channel.