After clicking the "Get started" button on our page or through the onboarding link you received, you will be directed to the following page.
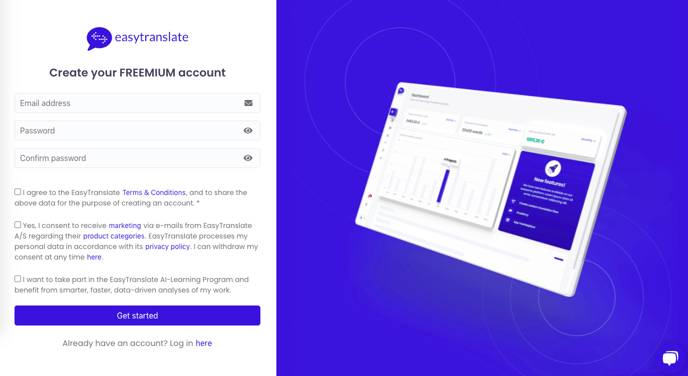
Enter your email address, choose a password, and confirm it. Check the boxes that are applicable to you, and click on the "Get started" button.
Please note that accepting the terms and conditions is mandatory.
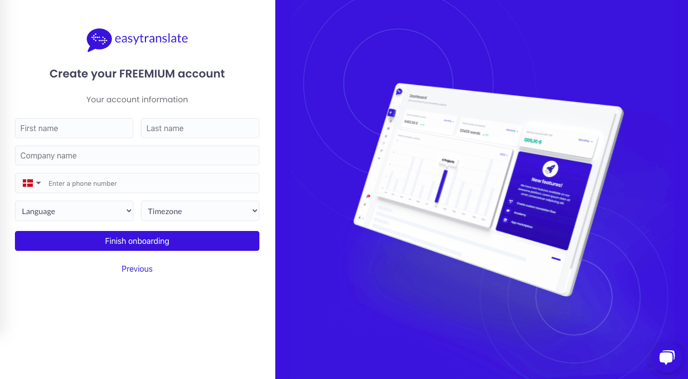
You will then be directed to the next page. Please fill in all the required information and click on the "Finish onboarding" button to complete the process.
Please note: the entered phone number must be unique, and cannot be a number that is already registered with us.
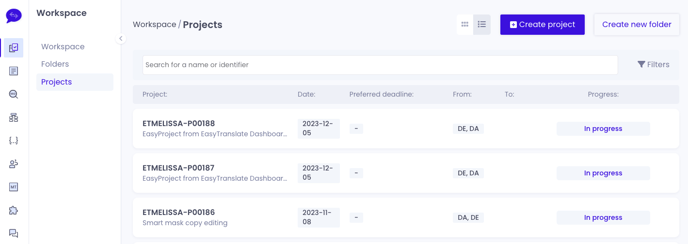
You will now be redirected to the following page. This page is your workspace and dashboard. Here, you can conveniently view all of your new, ongoing, and completed translation projects. On the left side of the page, you will find a collection of icons that represent various features. For more detailed information about these features, please see the articles related to the Workspace:
Projects
Create Projects
Folders
How to access and use the editor tool
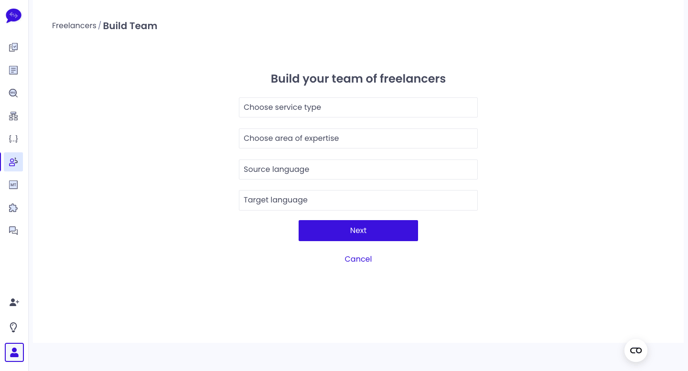
Now that you have successfully created your EasyTranslate account, you're probably excited to begin sending projects! However, to fully utilize our platform and receive high-quality translated content, you will need to build a freelancing team. Simply navigate to the freelancers tab, conveniently located on the left side of your screen.
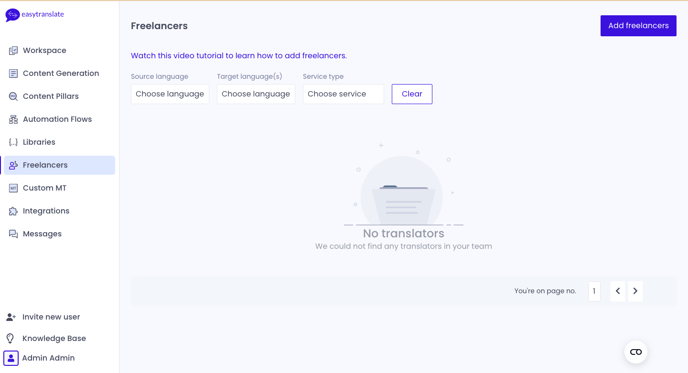
Then, click "Add Freelancers" at the top right.
You can choose to add a file while building your team. The file will go through our AI, and carefully select the linguists that are specialized within your content.
Select the source and target language that you need. Then, click "Next".
Note: It is optional if you would like help from the AI in the selection process, however please note that when adding your first freelancer/language pair you must upload a editable file (word, pptx, excel, etc)
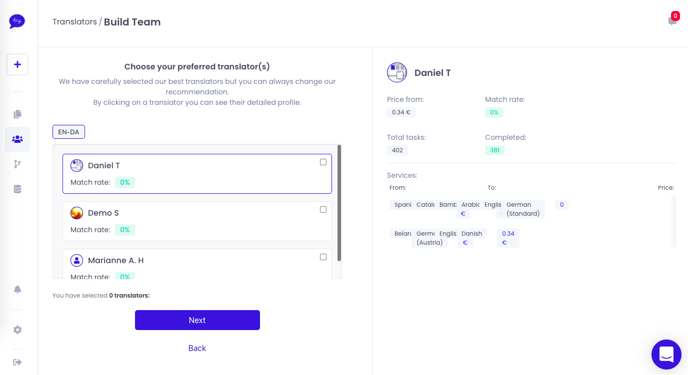
On this page, you are selecting your freelancers and building your team. By clicking on a freelancer, you can see their detailed profile and the language combination(s) they offer. In this view, you will also see the match rate - this is only relevant if you uploaded a file while sourcing for freelancers.
Select your freelancers, then click "Next".
Note: Depending on what model you are on, you will be limited in the amount of freelancers you can add.
You also have the ability to select freelancers for revision, please follow the same steps for this, and mark them instead as "revision". 
Confirm the team you have selected and you are finished building your team!
To add more language combinations you need to go through the flow again but with the given language combination.
Payment
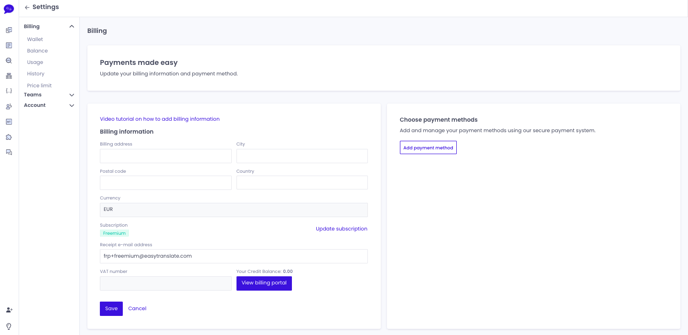
Your final step is to add your payment details so you can send content for translation. Go to Settings > payment > billing, and select your choice of payment and fill out the details.
The payment method box on the right will only appear once you have filled out all the slots under billing information.
You have now completed your onboarding and you are all set!
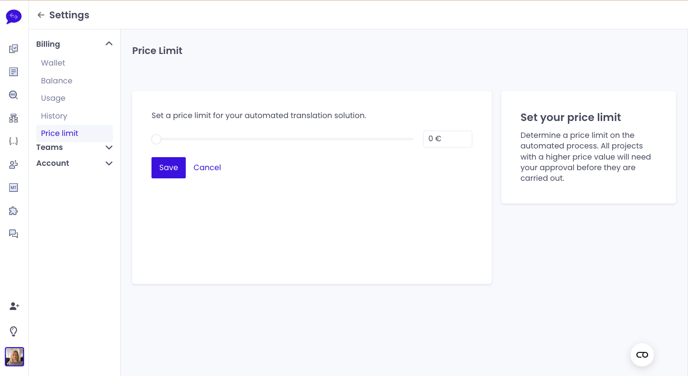
All projects with a higher price value than the price limit you have chosen will need your approval before they are carried out. If the price value is under the price limit you have fixed, the project will be carried out without requesting your approval. You can easily adjust your price limit and automate the process in the platform:
Navigate to Settings > Billing > Price limit
Please note: Upon creating your first project, your price limit is set to 0EUR by default.
Explore our guide on how to create projects and learn more about the features of our platform here.