![logo_blue (1).png]](https://knowledge.easytranslate.com/hs-fs/hubfs/logo_blue%20(1).png?height=30&name=logo_blue%20(1).png)
Part 1
How to access and view projects
What project details can be viewed
What are the different stages of the translation process
Part 2
How projects are created
How to approve or decline a project
Part 1
How to access and view projects
Overview
Projects are the core of your translation work, helping you organise content and manage the translation process efficiently. Each project can be customised to fit your needs, combining AI-powered translation with human expertise.
Depending on the setup, a project can move through different stages, ensuring the right balance between speed, quality, and cost. This flexible setup allows you to handle anything from quick translations to fully reviewed professional content. Read more about our customisable automation workflows HERE.
How to access projects
Projects are visible in your workspace overview and can be managed directly from the project menu. When opening the workspace it will always show the latest four projects that have been uploaded or edited.
 You can choose between list or card view to display projects in the way that works best for you.
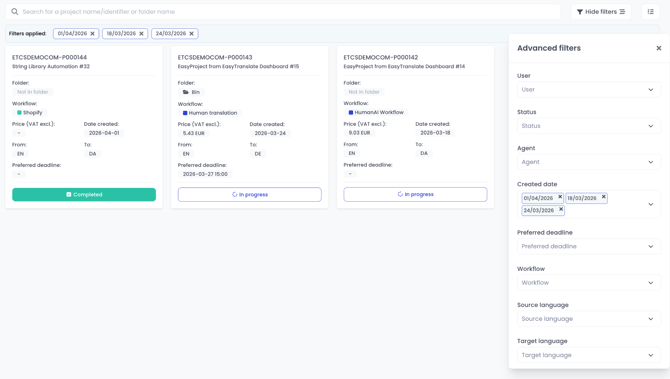
Within the project overview you can search for specific projects in two different ways. You can add project name, project identifier or folder names to the search bar to look for projects that match the added search term. Or you open the advanced filter sections by clicking on View filters to do some more in depth search.
You can filter by the following items:
- User: the platform user that uploaded a project
- Status: the stage the project is in, e.g. completed, in progress etc.
- Agent: the way the project was uploaded, so manually or via an integration
- Created date: the point of time for the upload
- Preferred deadline: the deadline that was selected during upload
- Workflow: the chosen automation workflow for the project
- Source language: the language of the source file
- Target language: the language the project was translated into
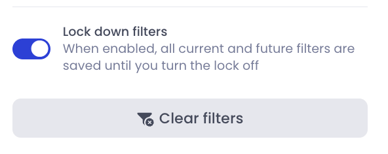
You can also choose to lock down the filters by enabling the toggle at the bottom of the filter dialogue, in case you want to return to the previously filtered view.
Once you add the filters, the view will immediately adapt to the items you have chosen. To reset the view, either click on Clear filters in the advanced filters section or click on the little cross next to the filter in the applied filters section.
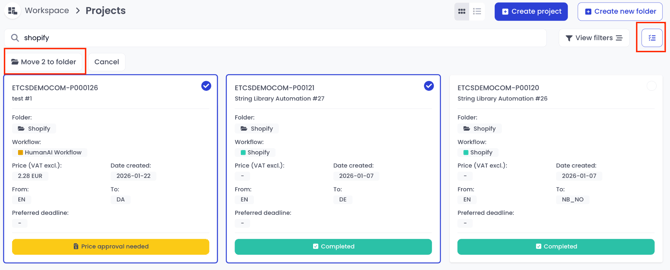
To better organize your projects, you can use the bulk selection feature to quickly move multiple projects into folders. Simply click the button next to View filters, then select the desired projects by clicking the checkbox in the upper-right corner of each project card. Once selected, click Move X to folder to place them all into the appropriate folder at once.
Depending on the stage of the translation process, the project will show a different status in the general overview. A project can have one of the following statuses:
-
Processing: project has been received and the file is currently being analysed.

- In progress: the translation is actively being worked on.

- Completed: all tasks are finished, and the project can be downloaded.

- Price approval needed: the project was caught by the price limit filter and is ready to be approved (or declined) from the customer side before the work can begin. When this happens the project creator or users with the relevant permissions will be notified via email as well.

- Price declined: the customer has rejected the cost, so the project will not proceed.

- Project cancelled: the project has been stopped and will not continue. This can have different causes, e.g. a wrong file format was uploaded. The cancellation can only be done from EasyTranslate side and the customer will always be informed about any cancellations.

What project details can be viewed
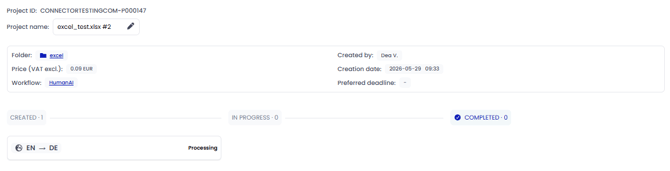
Click on the project card to access a detailed view where you can track your project through each stage—from creation to completion.
In this view, you can also find additional information on:
- Project ID: this is a unique identifier assigned to the project for tracking and reference. If you experience issues with a certain project, it is recommended to share the project ID with our support team for quicker resolution
- Project name: this is the name you give the project during the creation process and can be changed later on. Note that project names must be unique.
- Folder: the location where the project is stored on the platform. You can always change this later on.
- Price: the total cost of this project.
- Workflow: the selected (customised) workflow for completing this project..
- Created by: the user who initiated and set up the project.
- Creation date: the date when the project was created in the system.
- Preferred deadline: the requested completion date set by the project creator. If nothing has been entered here, the project will be completed as fast as possible. You will see the calculated deadline on each language card.
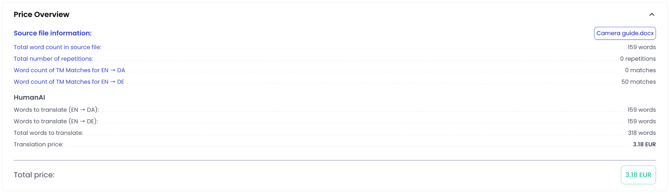
- Price Overview: this section provides detailed insights into the source file and explains how the project price is calculated. It breaks down costs by each language task and shows the total word count used to determine the final price.
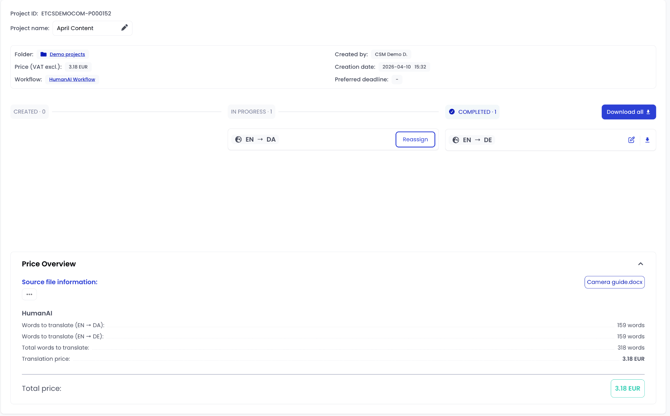 Clicking the three-dot button opens additional details about the project analysis. Here, you can review repetitions within the file and see translation memory matches for each language task. Please note that repetitions within a file are not charged when using HumanAI services.
What are the different stages of the translation process
In the detailed project view, each project is organized into three default stages: Created, In progress, and Completed. These stages represent the lifecycle of a project and help you clearly understand its current status at a glance.
Each project can include one or multiple target languages. Every target language is represented by its own task card within the project view. This means that if your project includes several languages, you will see multiple task cards—one for each language—allowing you to track their progress individually.
By hovering over a task card, you can view the individual processing steps for that specific language, along with the completion percentage for each step. This gives you a detailed and language specific view of how the translation is progressing.
When a project is first set up, all associated tasks appear in the Created stage. At this point, the project has been initialized, but processing has not yet begun.
As soon as the translation workflow is triggered, tasks automatically move into the In progress stage. During this phase, the project actively passes through the configured workflow connected to the customised AI system.
The progress indicators on each task card update in real time, reflecting how far the translation has advanced through the different steps..
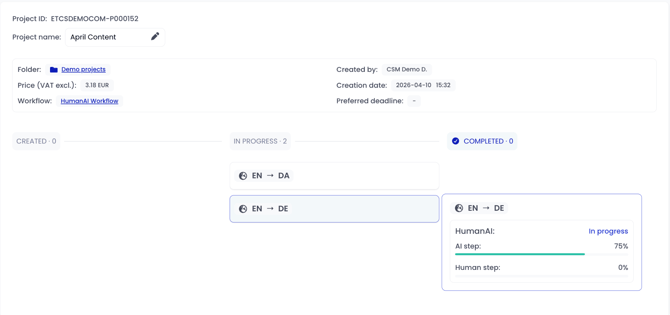
If any segments are flagged during the QA check, they are automatically assigned to a human reviewer. The reviewer’s name will appear next to the corresponding human step on the task card. This reviewer may be an internal team member or a freelancer, depending on how the workflow was configured. If a freelancer is assigned, the task card will also display the calculated task delivery deadline.
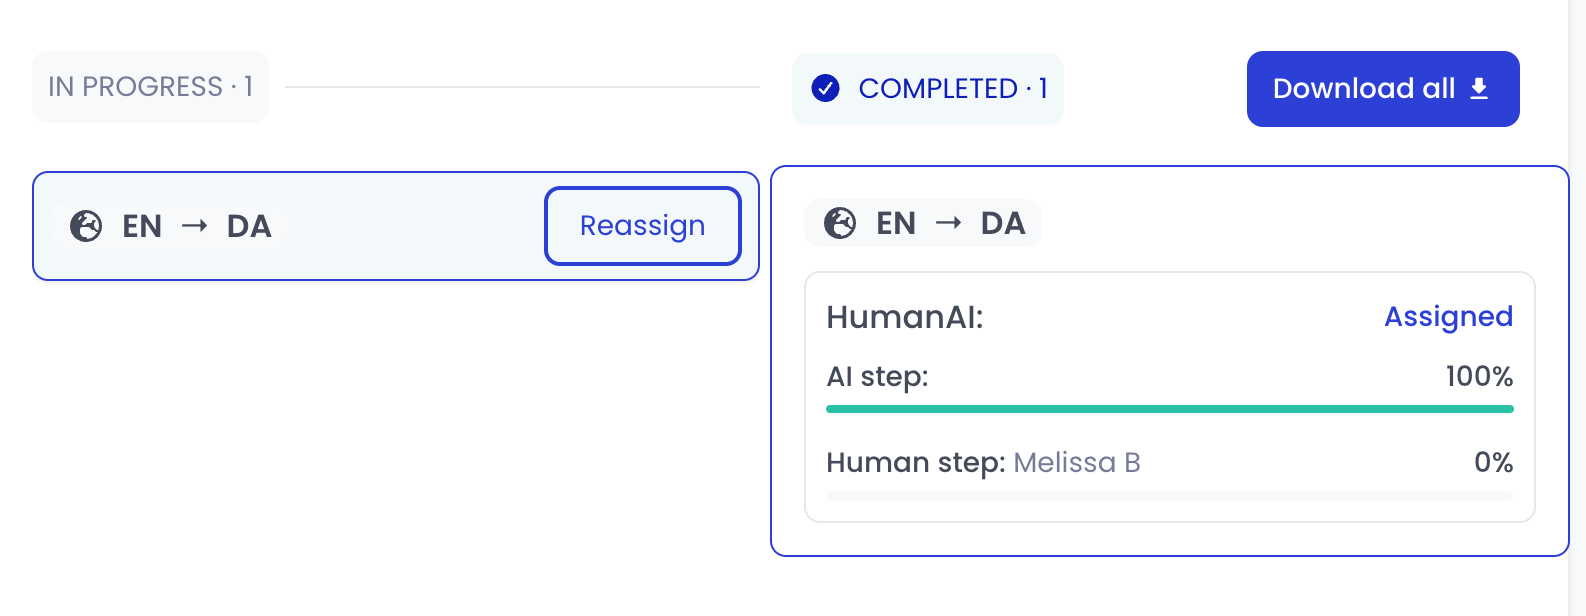
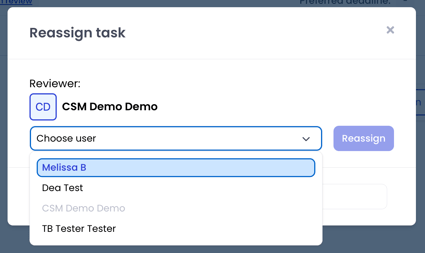
If internal reviewers from your company are part of the workflow, you will be able to see the Reassign button and can select a different user for the review if needed. Click on Reassign, choose the colleague you would like to take care of this task and confirm the selection.
Warning:
- Note that users will receive an email notification when they are assigned to a task, but no further notification is sent when the task is re-assigned to someone else. Make sure to communicate the updated task responsibility e.g. via our message function to avoid any delays.
Once all required steps for a task are completed the task is moved to the Completed stage. This indicates that the translation is finalized and ready for download. The project creator will receive an email notification, and the finished file can be downloaded using the download icon on the right-hand side of the task card.
When all tasks within a project are completed, you can use the Download all option to retrieve a ZIP file containing translations for all requested target languages.
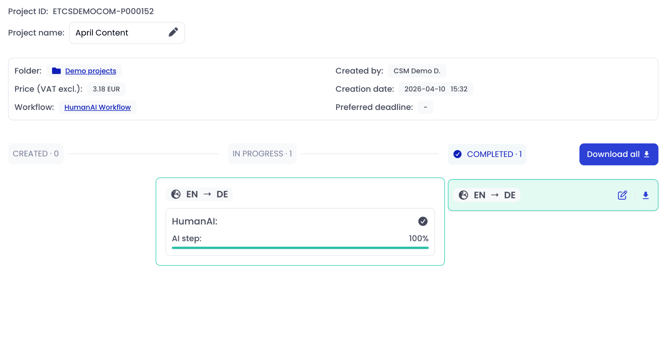 Once a task is completed, you will also be able to access the internal review editor to make further adjustments to the translation. Read more about this editing tool HERE.
Good to know:
- If a task card shows a clock icon instead of the download button, this may indicate that the task requires a technical check. In this case, please reach out to the support team via our website chat for assistance.
Part 2
How projects are created
How to create a project
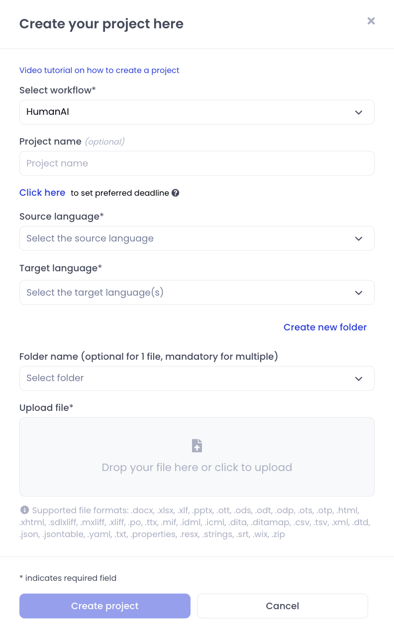
Creating a new project is straightforward. After logging into the platform, navigate to your workspace and click Create project in the top-right corner. A dialog will appear where you can enter the required project details.
Good to know:
- If you don’t see this button, your role permissions may not allow access. Please contact your platform administrator or our support team via the website chat to verify your permissions. You can read more about role and permission settings HERE.
Select Workflow: start by selecting the workflow. You can choose between any customized HumanAI workflow that has been set up by your AI training specialist or the standard workflows. As a default the workflows are always available:
- Human Translation
- Human Translation + Review
- Machine Translation
Good to know:
- For Human Translation & Review, you must have at least two translators per language pair on your team to use this service.
Read more about workflows and the creation of automated workflows HERE.
Project name (optional): Enter a name that will help you easily identify and manage your project. You can always change the name at a later stage as well. You cannot use the same project name twice.
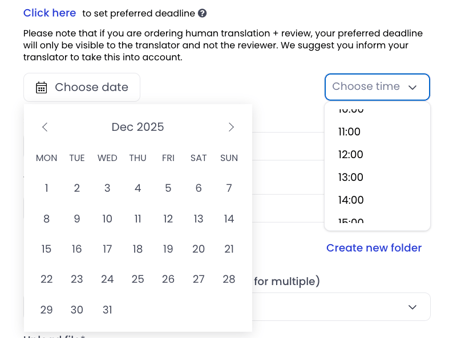
Preferred deadline: You can set a preferred deadline for your project, which is especially helpful if you have a fixed delivery date. A long-term deadline also allows translators to plan their workload and complete the project over an extended period. To set the deadline, press Click here and enter the desired date and time. Please note that all times are in UTC.
Good to know:
- The preferred deadline overrides the usual assignment logic and does not take your translators’ availability into account. As a result, they may not be able to meet the preferred deadline. If you are unsure, we recommend reaching out to our support team via the website chat to confirm the preferred delivery date.
Source language: Select the language of the text you will upload.
Target language: Select the language(s) you want your text translated into. You can do this in two ways. Choose one language at a time from the drop down menu showing the languages available in the selected workflow. Alternatively, click on Select all to automatically add all languages available in the selected workflow. You can remove any languages you don’t need.
Good to know:
- You can only select languages that are configured for the chosen workflow. If any languages are missing, please contact your customer success manager or reach out via the support chat.
Folder name: If you want to place the project in a folder, select one from the dropdown menu. It displays all of your existing folders. Please note that if you upload more than one file at the same time, you must select or create a folder before you can create the project. You can also move the project to a different folder later on. Read more about folders HERE.
Upload file: Select one or more files to upload for translation. Each file will generate its own translation project, and all projects will share the same settings—for example, the same target languages. You can drag and drop files into the upload area or click the grey space to open a file dialog and choose your files. This provides a fast and convenient way to create multiple translations.
Good to know:
- You can upload as many files as you want at a time, with a maximum total size of 90 MB.
- Supported file formats:
.docx, .xlsx, .xlf, .pptx, .ott, .ods, .odt, .odp, .ots, .otp, .html, .xhtml, .sdlxliff, .mxliff, .xliff, .po, .ttx, .mif, .idml, .icml, .dita, .ditamap, .csv, .tsv, .xml, .dtd, .json, .jsontable, .yaml, .txt, .properties, .resx, .strings, .srt, .wix, .zip. - PDF is not a supported file type because the content is locked. PDF files always require a preparation step before uploading. For more information, please contact your customer success manager or the website support chat.
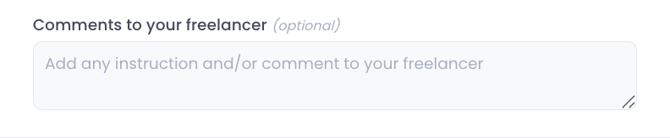
Comments to your freelancer: When using a human translation workflow, you can add comments to the task for the translator(s) working on your project. This allows you to provide context, clarify instructions, or share specific preferences, helping ensure a more accurate and tailored translation.
Create project: Click on Create project to complete the project creation form and submit the file for translation.
Good to know:
- In case you are not able to click Create project this might be due to the file size being too big or the file type not being supported.
Warning:
- Projects cannot be changed or cancelled after price acceptance. If you made a mistake or submitted a duplicate, contact our support team via the website chat. Depending on the status of the task, a credit note can be issued.
Cancel: Click on Cancel to stop the project creation and return to the workspace. Any information you have entered will not be saved.
How to approve or decline a project
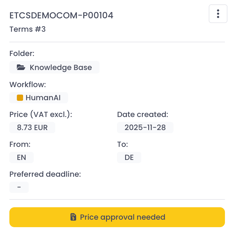
If you have enabled the price limit filter, your newly created project will show the Price approval needed status in case it exceeds the set price limit. This feature ensures full cost control and prevents unexpected charges. It also improves transparency and helps teams stay within budget. Read more about the price limit filter HERE.
Click on the project to proceed to the detailed project view. From here you can approve or decline the project.
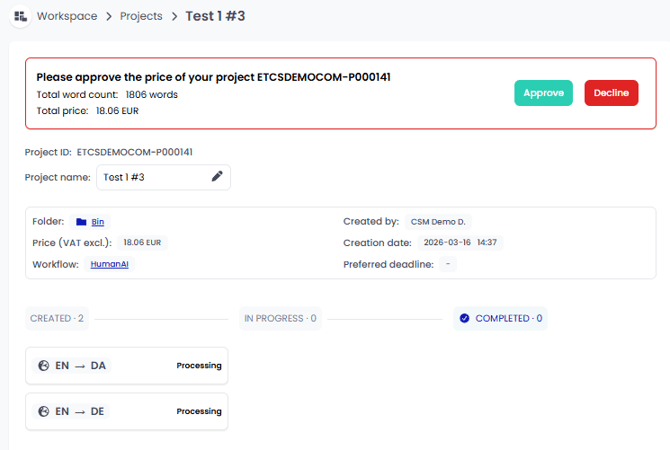 Approved projects will move to the IN PROGRESS stage, declined projects will be cancelled and show the status Price declined.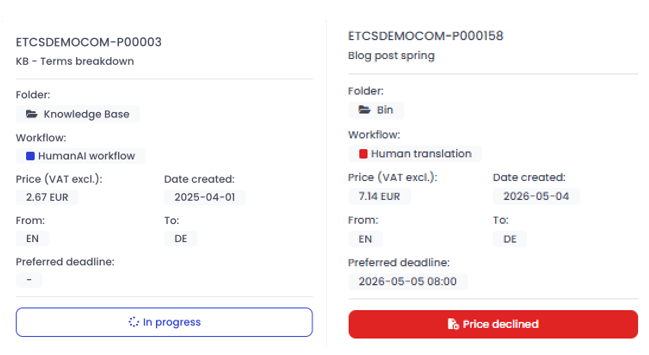
How to handle ZIP files
The platform supports ZIP file uploads, preserves the folder structure, and replicates it in your workspace. Once the translations are finalised, the downloaded folder will be a localised replica of the original ZIP file. Before you can create projects for ZIP files, the included file types must be registered on EasyTranslate. You can choose to include all file types or only select ones. Please note that only the registered file formats will be included in your translation projects, the remaining files will be skipped and returned untranslated. This also applies to unsupported file formats such as JPEG or PDF.
If you would like to upload ZIP files, please contact us via our website support chat or reach out to your customer success manager.
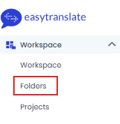
Upload , approval and project monitoring: The folder structure of your ZIP file will be recreated on the platform. Individual projects will use the file name, while folders keep their original names. To view the file structure and approve your projects, go to Folders and click on the relevant folder to open and review its contents.
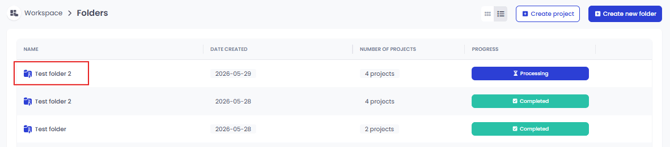
At the top of the detailed folder view, you will find a comprehensive list of all relevant files uploaded via the original ZIP file, along with the word volume and price. You can click Approve all or Decline all to handle all projects at once. Alternatively, you can approve or decline projects individually.
Below this approval list you can follow the progress of your translation projects and access the content of the individual folderst contained in your upload.
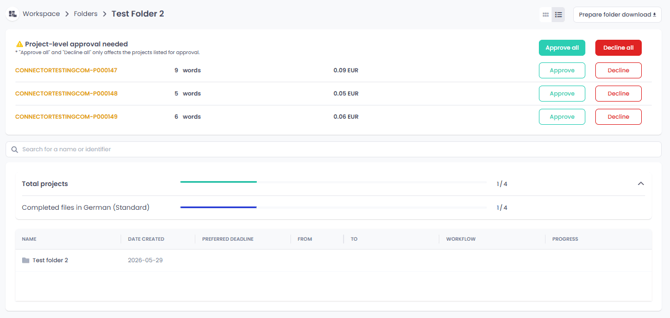
Click on the folder name to access subfolders and the individual translation projects.
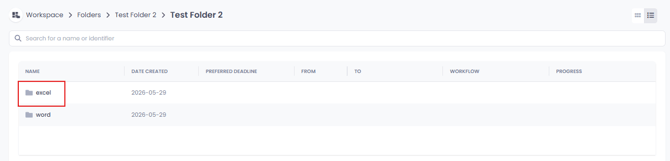
Example: Test Folder 2 contains 2 subfolders with 2 files each. Currently 1 project is finalised, the remaining 3 projects still await approval. Click on the subfolder to show the content on project level. Finally, click on the individual projects to access all project details.
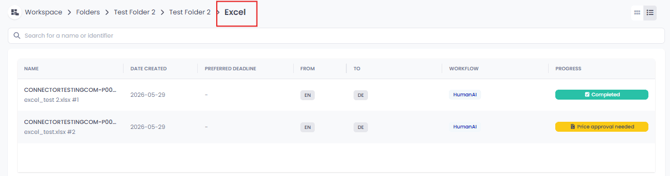
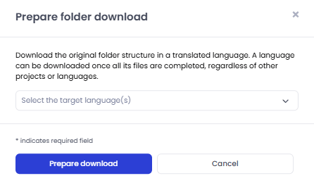 Download of final files: Once completed, the final files can be downloaded per target language. You can either download the entire folder structure as a ZIP file or download individual projects by accessing the respective tasks, as described above.
ZIP creation: To start a ZIP download, open the folder you want to download and click Prepare folder download in the top-right corner. To generate a ZIP file for a specific language, all projects in that folder must be completed. You do not need to wait for other languages to be finalised before starting the process. The target ZIP file will only contain the localised version, as the source content is replaced. Select the target language from the dropdown and click Prepare download to start the process. As soon as the ZIP is ready for download a Download zip button will appear on the top. right. Click on it to view the details of the prepared files, such as date and time when it was created.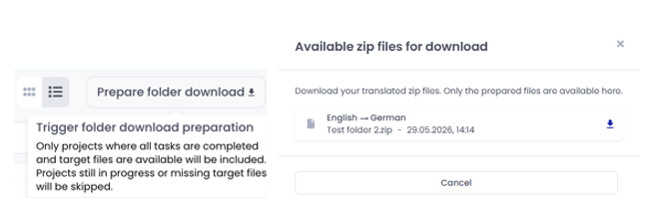
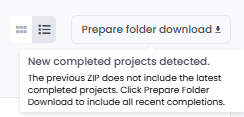 ZIP re-creation: Always ensure your ZIP download contains the most recent files. Before downloading, you can check whether the system has detected any newly completed projects, such as updates made in the internal review editor. If new files are detected, trigger a new ZIP creation by clicking Prepare folder download.
Warning:
- You can upload ZIP files and preserve their folder hierarchy on the platform. However, this feature must first be configured and enabled in the project template. If you need to enable ZIP file uploads, please contact us via our website support chat or reach out to your customer success manager.